
Hey guys, today I will show you how you can change all your Windows 11 and 10 default icon folders with Iconpackager! If you do not know what it is don’t worry will go over what it is and how to use it. Below are demonstrations shown for Windows 11 but it is the same for Windows 10.
What is Iconpackager?
Iconpackager is a simple program that lets you change all your default icons, cursors, and more, it’s not free and does cost $9.99; however, you can do a FREE 30-day trial with your email to see if you like it first, which I recommend doing before purchasing.
If you don’t want to use your main email you can use instead an online service called
10-min emails. Click on the 10-minute email link and simply use the free email provided for you to use, near the bottom it will show any email it receives.
What you will need to get started
1. An icon pack you would like to use, check out my icon packs here at Deviant Art, they are FREE!
2. A way to change the icon folders, could be with either “Iconpackager” I mentioned, “FilesTypeMan”, “Types“, or any other program that lets you change the icons. You can also do this individually which I will show and explain in this article, but keep in mind this won’t change all default icons all at once like “Iconpackager”, this will be just for individual folders.
How To Change The Default Of All Folder Icons Including Drives
1. First let’s download the Iconpackager, once installed and ready head to the “customize” option in the menu and select the system files you want to change. In this case, we would like to change the main default folders and the “Live Preview” thumbnail folders. To do that select from the dropdown menu to “folders”.
2. To change the default icons you can either right-click on the icon preview folders or click the button on the menu that says “Change This Icon”.
3. In the pop-up window, click the “browse” button to go to your selected folder with the customized icons. Select the icon from your folder and click the “OK” button.
Note: You can also use the default Windows icons that are provided, but I recommend changing to a custom icon so you don’t get confused with the same icon being used for something else.
4. When you are done modifying the icons click the button that says “Apply My Changes” and that’s it you are done!
SOME IMPORTANT THINGS TO NOTE
Iconpackager is NOT perfect! So your folder might glitch by showing the default page icon or become blank. If that happens don’t worry, simply click the dropdown that says “Restore Default Icon” or click on the button that says “Restore All Desktop Icons” and try again by closing the program and re-opening and then re-applying those same icons.
Another thing would like to mention is that IconPackager might not work properly for different “file types“, like the ZIP folder icon. In this case, I recommend the FREE programs I mentioned earlier that can change these file types.
The one I currently use is “Types” and it is a free program and super easy to use. Just open the program and will show all your file types. To edit simply right-click any file type and change the icon in the pop-up window, no need to refresh or press apply does it automatically.
How to Change the Icon of an Individual Folder or Shortcut
If you’re looking into changing the individual icons like the icon of a shortcut or the icon for a folder, you can do that with these steps.
Note: There is a small difference between shortcuts and folders. The “Shortcut” tab is created from shortcuts you made from programs or folders ( Shortcuts are usualy created automatically from downloaded programs. You will know if its a shortcut if you see the the blue arrow on the corner of the icon) and the “Custumize” tab is from the file explorer.
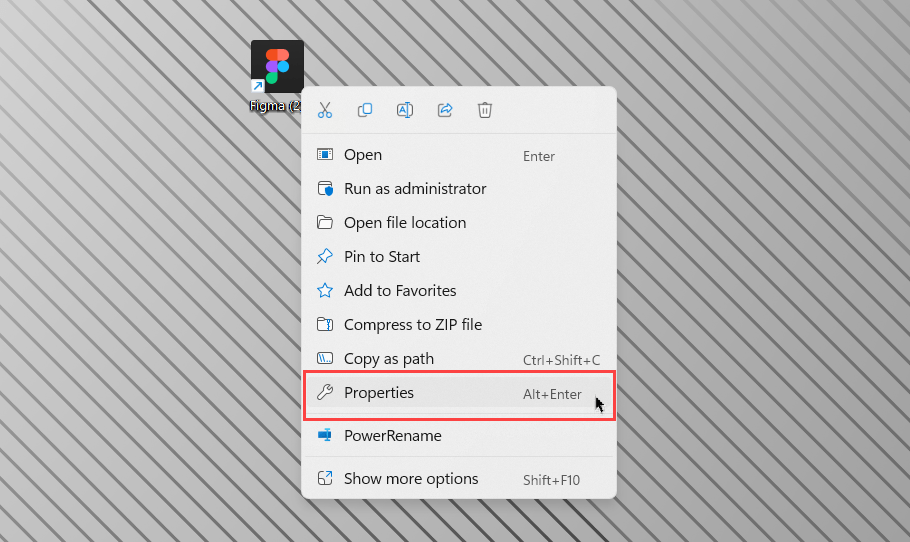
1. To change the icon find the folder or shortcut you want, right-click it, and then click “Properties”.
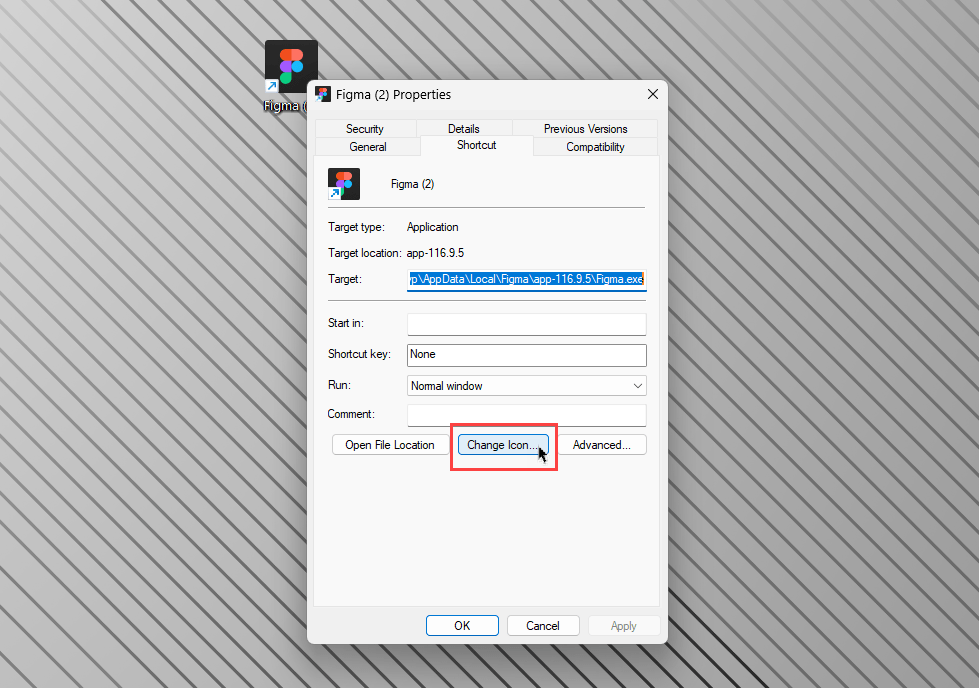
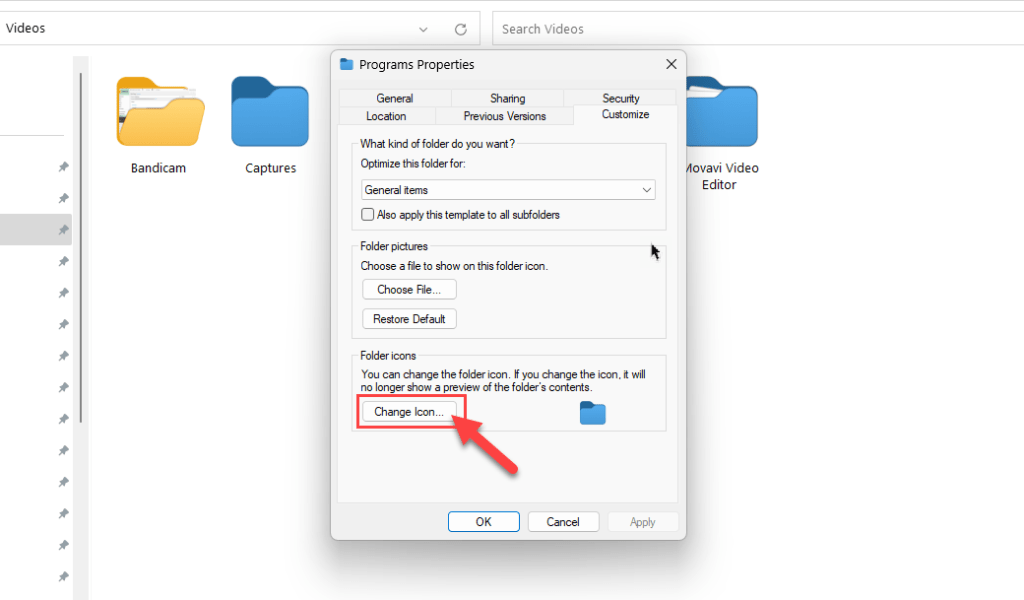
2. Then click on the “Shortcut” or “Customize” tab from the Windows Explorer and click “Change Icon.”
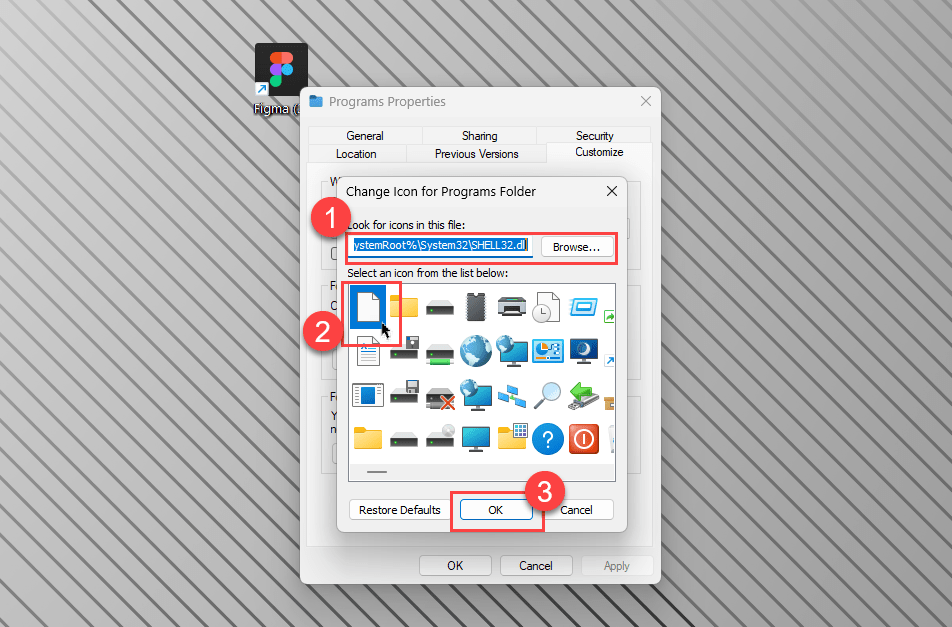
3. In the pop-up window, you will see a collection of icons you can use, choose from either the icons provided or click the “browse” button to choose from your icon folders. Once you have selected your icon click “ok”.
Warning: You cannot move an ICO file to a different location if it has been used to change the icon of a folder, this will break the new icon and revert back to the old one automatically if you do. Make sure you put your icon somewhere it can stay indefinitely.
If you found this article helpful please comment below, and let me know what you think! Check out my other posts for more goodies!